


Pro 5.0 Shifter Install
E-mail jmX with corrections
Click here for a printable version
| Tools you will need: |
- Flathead screwdriver with "blade" at least 4" long - Pliers - 7/32" Allen wrench - Socket Wrench - 10 mm socket - 7 mm socket - 1/2" socket - 6" Socket Extension or longer - Tire chocks - High-temp Silicon Gasket Maker ($3 from autoparts store) - Light to medium strength Loctite threadlocker ($4 from autoparts store) |
Lets begin:

|
Here is a pic of a stock Hurst shifter in my SS. This install will be the same reguardless of what shifter you have
from the factory. First off, block off the rear or front wheels to make sure the car won't be rolling anywhere. Then
put the car in neutral. Now, read through this whole install first and decide if you want to use the shifter stop bolts or not.
I chose not to use them and now would be a good time to remove the bolts all together...its very hard to remove them once the shifter is
installed. If you can't decide, don't worry about it. You can always back the bolts off later so they will effectivly not be used.
Now is also a good time to tighten down the stick on the pro5. The stick is held on by two bolts with a 7/32" hex hole bolt. Use the allen wrench to tighten this down good and snug. I didn't do this step originally and the stick almost came all the way off in my hand at high speed!! |
|
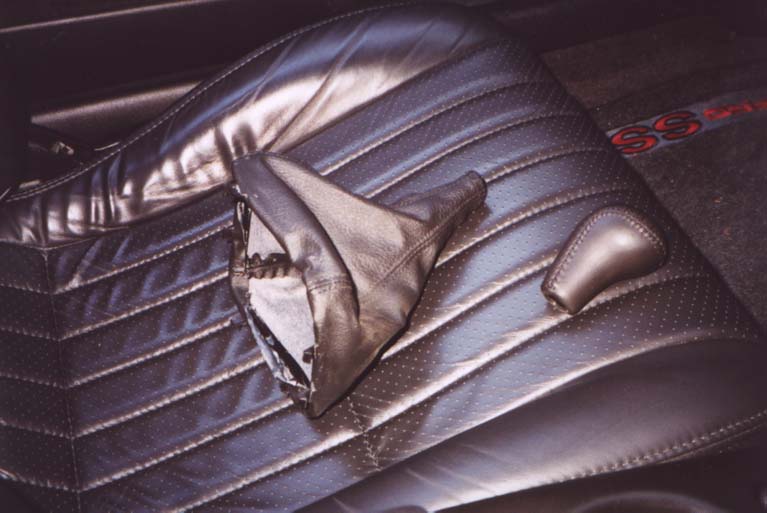
Next, unscrew the shifter knob counter clockwise. On my car this was *VERY* difficult, taking nearly 5-10 minutes to finally get the thing off. I was twisting so hard I thought I was going to break the stick! Once this is off, carefully pry up the outer shifter boot...its the leathery boot in the picture to the left, and is only held down on the colsole by a couple of plastic clips. |
|
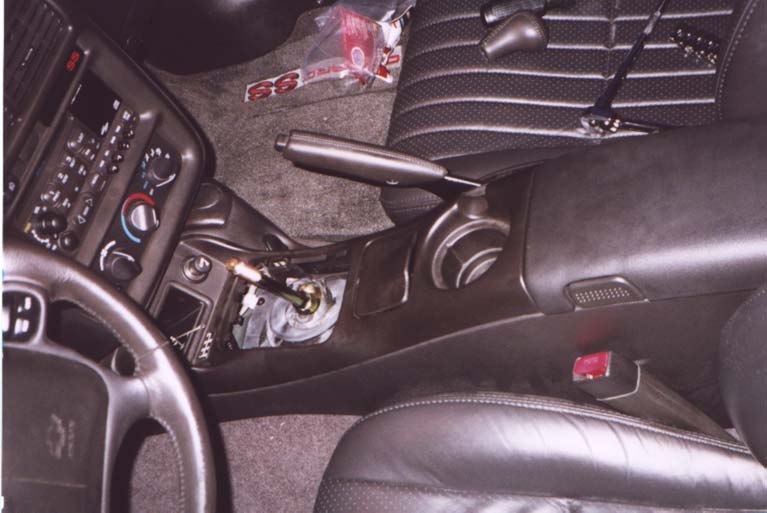
Now you should see something similar to the picture on the left. |
|
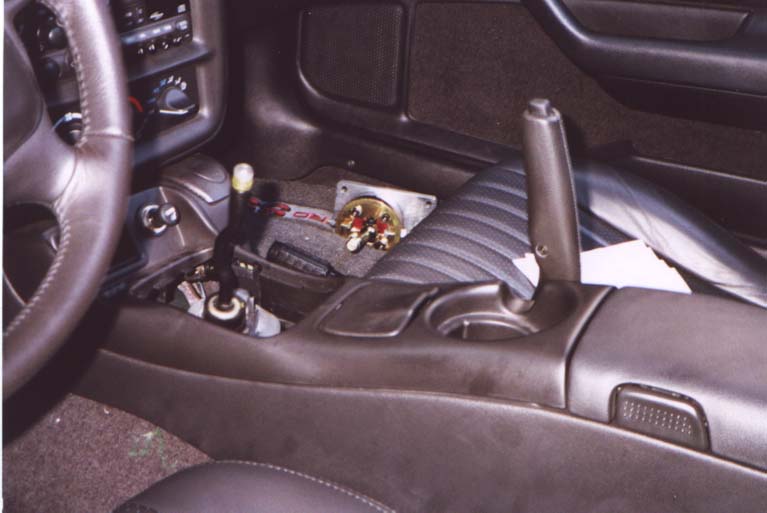
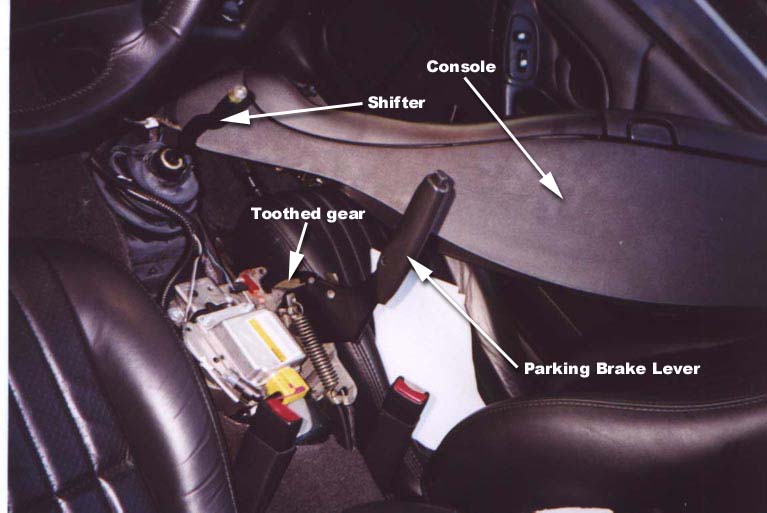
The next step is possibly the hardest to explain. The goal is to get the parking brake lever to point straight up into the air (See pic). The
easiest way to do this (and possibly the only way?) is to put the parking brake lever down so the brake is not engaged at all.
Now, look through the slit in the console where the parking brake is and you can see a small copper colored "paw" which is set against a curved geared piece of metal. This is the part that goes "click click click click" when you pull up the parking brake....pull the lever up a couple of times and see where the noise comes from to help find the part. So, with the lever all the way down, you see the copper colored "paw" isn't quite touching the gear, so slide your flathead screwdriver inbetween the paw and the gear, then lift up on the lever. It shouldn't be making any "click click click" noise since the screwdriver is inbetween the pieces and the lever should come all the way straight up, like shown in the picture to the left |
|
Now we need to remove the whole center console. This step is EASY. First off, open up the ashtray holder and you'll see there
is a little light clipped in on the front right part of the tray. Just squeeze the clamps that hold it in until it drops down
into the console. Then remove the ashtray by pulling straight up on it.
Below the ashtray you'll see one 10mm bolt head, remove this. Then open up your console storage bin and remove 3 more 10mm screws from there, as well as 2 7mm ones.Now look where the front of the console down by the foot area, and you'll see one more 10mm screws holding the console on each side. Remove both of these. Now, your console is completly unbolted, carefully lift up on it making sure that the parking brake lever isn't getting damaged by the sharp plastic edges of the console. Also be warned that the console is still tethered to the car by some electrical cables for the lighter...these cables can stay attached. Once you have the console lifted off of the parking brake lever and shifter stick, gently set it down on the passenger seat like shown in the picture to the left. |
|
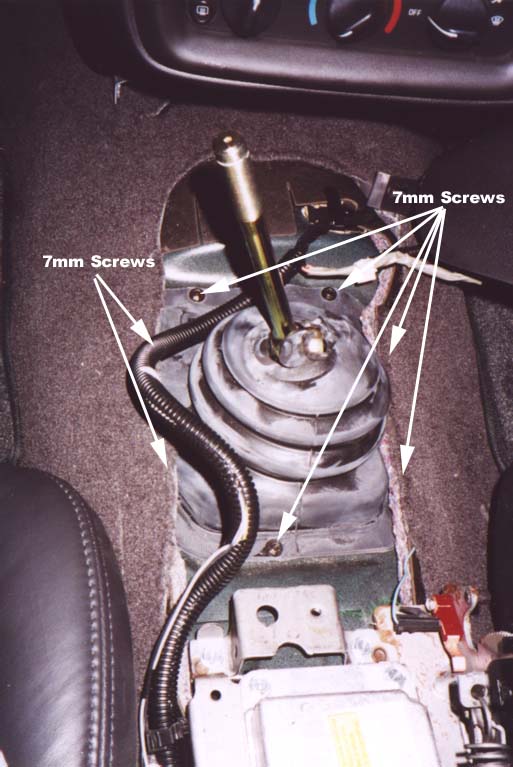
Next, remove the 7 7mm hex screws from the black rubber boot that is on the stock shifter. 4 of them on the sides will probably be covered by carpet...just move that out of the way. |
|
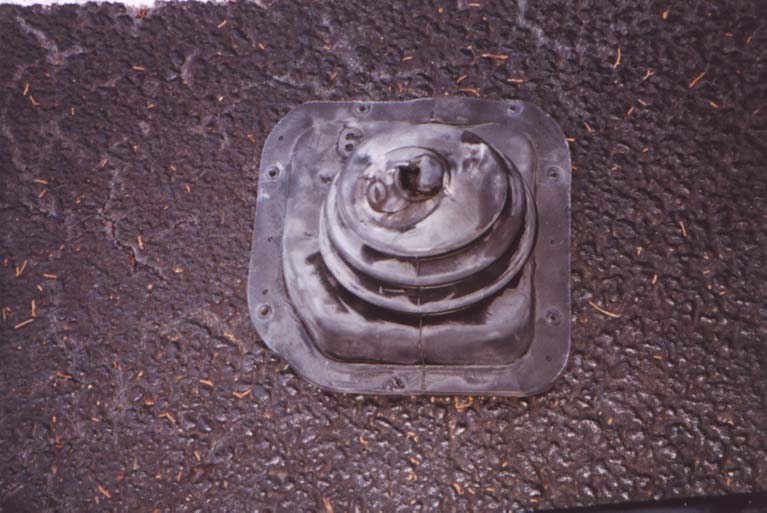
This is the infamous "#6 Boot". Some people say to cut it, others don't. I say, DONT. You'll be happier if you don't due to a quieter ride. |
|
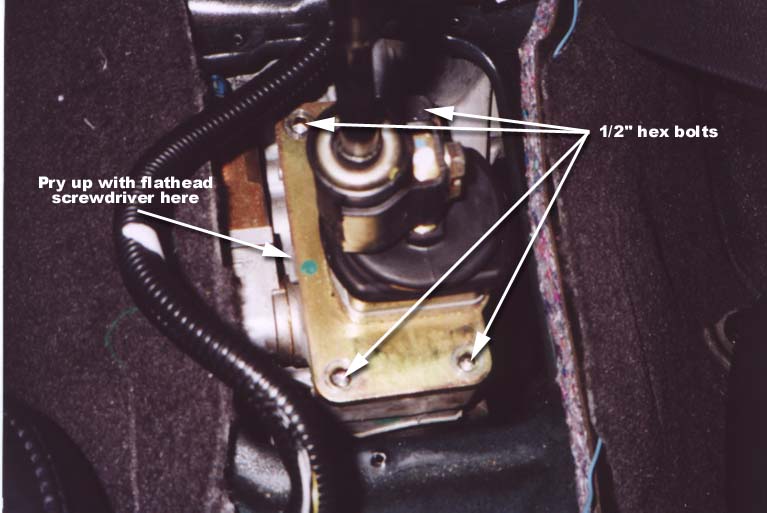
Now, remove the 4 1/2" hex bolts from around the shifter baseplate. Once they are all removed, use the flathead screwdriver to pry up the baseplate off the transmission. This could take a minute or two...just keep trying. Eventually it'll pop off and possibly go flying :) Don't ask how I know. |
|
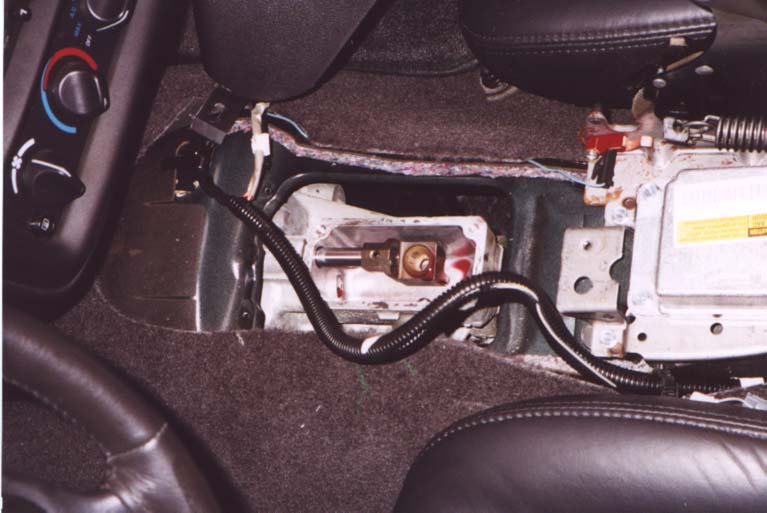
There we go....we now have the shifter off! Its all downhill from here. Go ahead and clean off any old gasket material from the the shifter mount. |
|
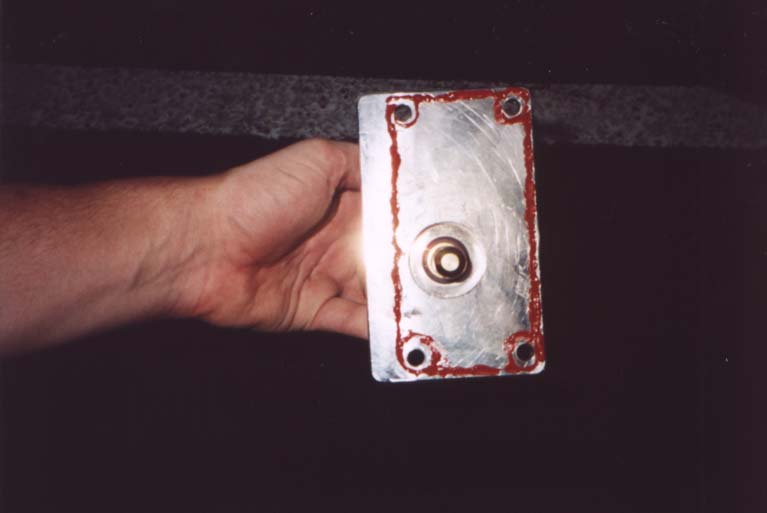
Apply some Silicon gasket maker onto your new pro5 shifter like shown in the photo to the left Alternativly, you can apply the gasket maker to the mount point on the tranny....in hindsight I think this would be the best way to do it. Make sure you completly circle the 4 bolt holes. |

|
Now, firmly place the shifter onto the tranny making sure the ball of the shifter goes into the tranny socket, and line up the 4 bolt holes.
Apply some loctite to the 4 bolts (using the new bolts that came with your pro5.0 shifter, and bolt them in. Don't go crazy and
overtorque the things, just snug them down. As a test, push the clutch in and see to make sure the shifter works by rowing through some
gears.
Now, check your stop bolts. These are the 2 bolts that come from the top and bottom of the shifter and stop the stick. THIS STEP IS VERY IMPORTANT. You need to make sure the shifter FULLY ENGAGES each gear with about 1-2mm clearance off the bolts. If it doesn't, adjust the bolts so the shifter has the full range of motion. There has been debate whether these are needed in the first place, so I just backed mine off the whole way and tightened the bolts down with pliers so there was no way possible they could get in the way. Removing them all together is a valid option as well. If I had to do the install all over again, I'd remove them. Now, put the #6 rubber boot on the shifter and screw it down with the 7 7mm screws. Move the console back into the general viciniticy it came from and reinsert the cigarette ash tray light into its socket. Now place the console back where you got it, being carefull not to scratch up the parking brake lever and making sure the seatbelts are out of the way. The console may take a bit of adjustment before it finally falls into place. Once the console falls into place, put the 3 10mm and 2 7mm hex screws back in the storage area, put the 10mm hex screw back in under the ash tray, and put the 2 10mm hex screws back in at the front of the console. Snap the leather boot back into place over the shifter, and screw the knob on. Remove the wheel chocks and start the car up! Make sure you can shift to all the gears quickly with minimal noises. If you hear anything loose, take the boot off and find out what it is immediatly. Once everything is all sorted, go for a test drive with your brand new shifter! |